|
|
|
|
|
|
Building a stackup with Speedstack's Virtual Material Mode
Application Note AP526
|
|
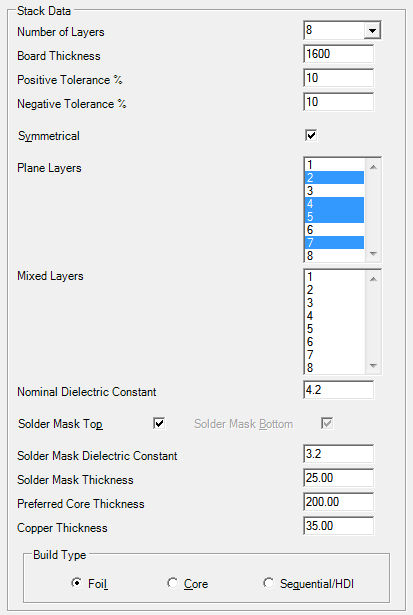
Speedstack's Material Library and Virtual Material modes Speedstack provides the option to switch easily between Material Library and Virtual Material modes allowing you to build and experiment with stackups (for example to examine the effects on impedance structures of different trace widths or dielectric heights) without requiring real materials to be entered into a materials library. In Virtual Material mode the Stackup Wizard is used to enter a few details about the stack, the number of layers, overall board thickness, plane layers, etc., along with solder mask and copper thickness. Speedstack will then build a stack to the specified board thickness by equally distributing the dielectric regions. If a preferred core thickness is specified the software will maintain the dielectric thickness for core regions but then equally distribute prepreg regions to reach the target board thickness. Building a stackup In this stackup, select the Stackup Wizard to build a 1.6mm thick, symmetrical, 8-layer stack with plane layers on 2, 4, 5 and 7 and one controlled impedance structure on the top layer. In this discussion all units are in microns. Click the Select Symmetrical Mode button. From the Units menu choose Microns. From the Tools menu choose Virtual Material Mode; select File|New and choose the Stackup Wizard; fill in the Wizard's parameter fields as shown below. For this structure choose a solder mask thickness of 25 microns, a core thickness of 200 microns and copper thickness of 35 microns; Speedstack stores the entered values for future stacks.
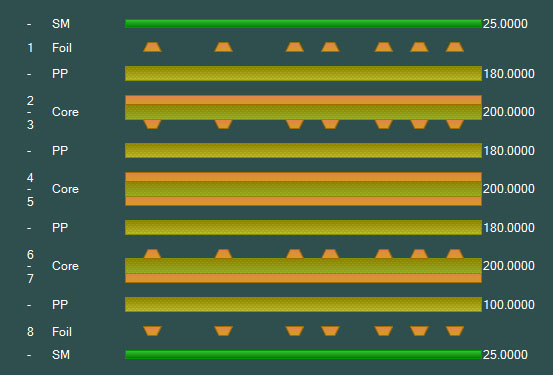
Click Finish to complete the Wizard and display the stackup in the Stackup Editor. Speedstack will build the stack (shown below) to achieve the specified board thickness.
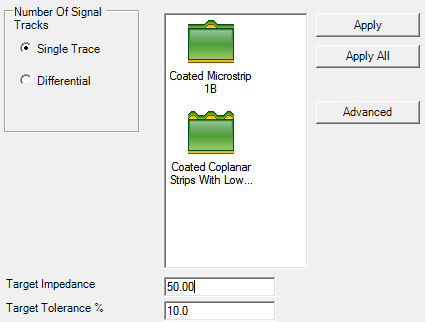
Adding an impedance structure Select Layer 1 Foil in the stack and click the Controlled Impedance tab; click the Add New Structure button and choose the single-ended Coated Microstrip 1B structure with a target impedance of 50 Ohms. Click Apply then Done.
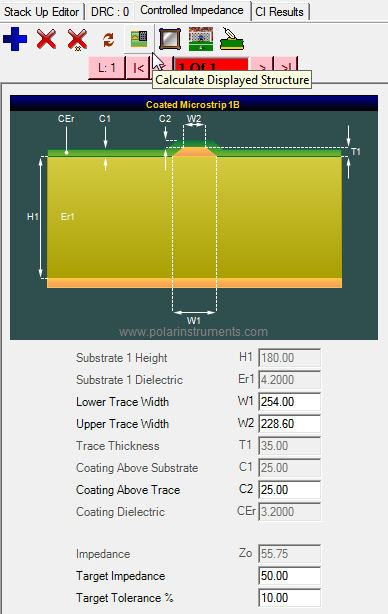
Calculate the impedance of the structure – for the parameter values below, the resulting impedance is 55.75 Ohms.
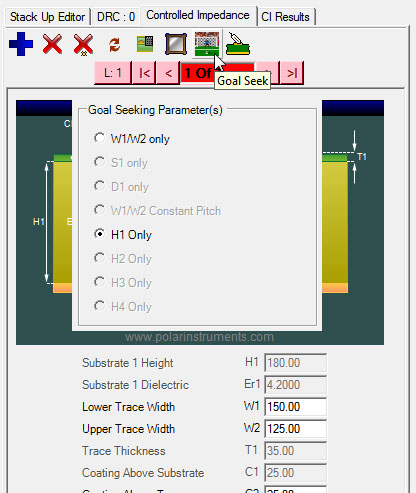
For this example structure, the range of acceptable trace widths is specified as 125–175 microns with an etchback of 25 microns, so change W1 to a nominal 150 and W2 as 125 and recalculate – the impedance increases to 70.21 Ohms. Goal seeking the impedance value For this example, keep these trace widths and goal seek for 50 Ohms ±10% on layer 1 dielectric height (H1).
Speedstack calculates the substrate height required for a 50 Ohm structure – click the alert (below) to display the new parameter value, 93.75 microns; for this example, approximate and round H1 to 100 microns.
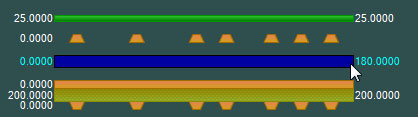
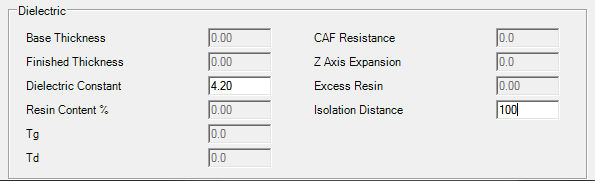
Right click the Layer 1 prepreg (highlighted in blue below) and in the Prepreg Properties dialog change the Isolation Distance from 180 to 100 microns.
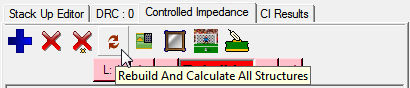
Rebuild and recalculate the stack with the new isolation distance. The structure's impedance now reads 52.03 Ohms.
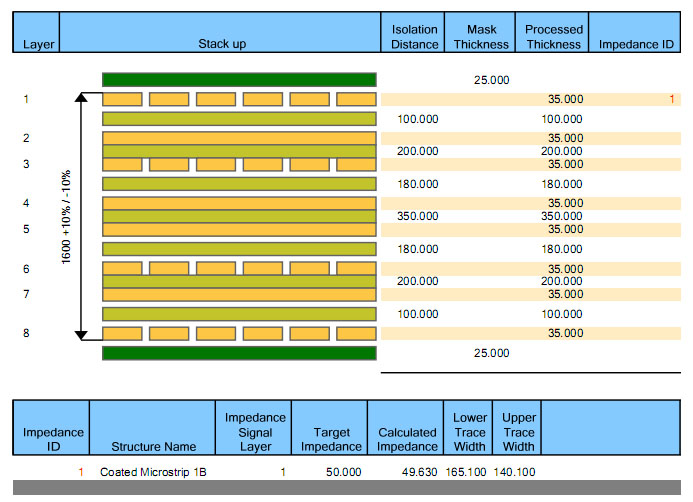
For this example, repeat the goal seek, this time seeking on W1/W2 only; the resulting impedance reads 49.63 Ohms. Restoring the overall stack thickness As the stack is symmetrical the overall stack thickness has decreased by 2 x 80 = 160 microns.
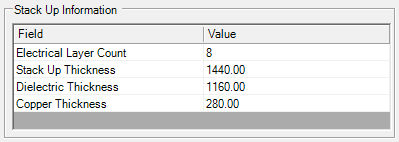
To restore the original stack thickness (to a first approximation) add 150 microns to the core between layers 4 and 5. Right click the core and increase the Isolation Distance to 350 microns; rebuild the stackup – the overall thickness is restored to 1590 microns. From the File menu choose Print|Technical Report; the stack is shown below. Click the graphic to display the full report.
Virtual Material mode allows you to explore other "What-If?" scenarios, for example, the effects of adding more impedance structures to layer 1 or to other layers. Experimentation with stacks is now fast and easy and requires no library preparation. Speedstack VMM provides powerful options to build and experiment with stackups in a "freehand" mode without reference to material libraries. You can pass your completed stack concept to your fabricator to edit in appropriate material or, for more specialized applications, perform material allocation in house. |