|
|
|
|
|
|
Building a rigid-flex construction
Application Note AP543
|
|||
|
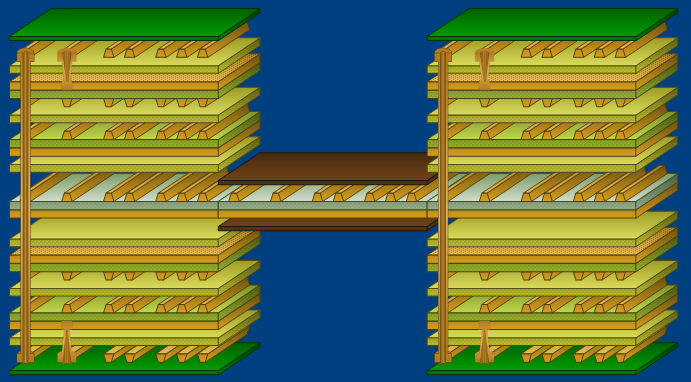
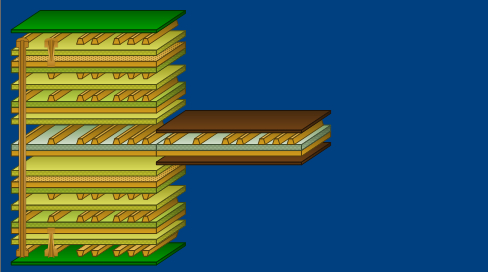
Building a rigid-flex construction with Speedstack This note describes the construction of the rigid-flex-rigid stackup in the graphic below.
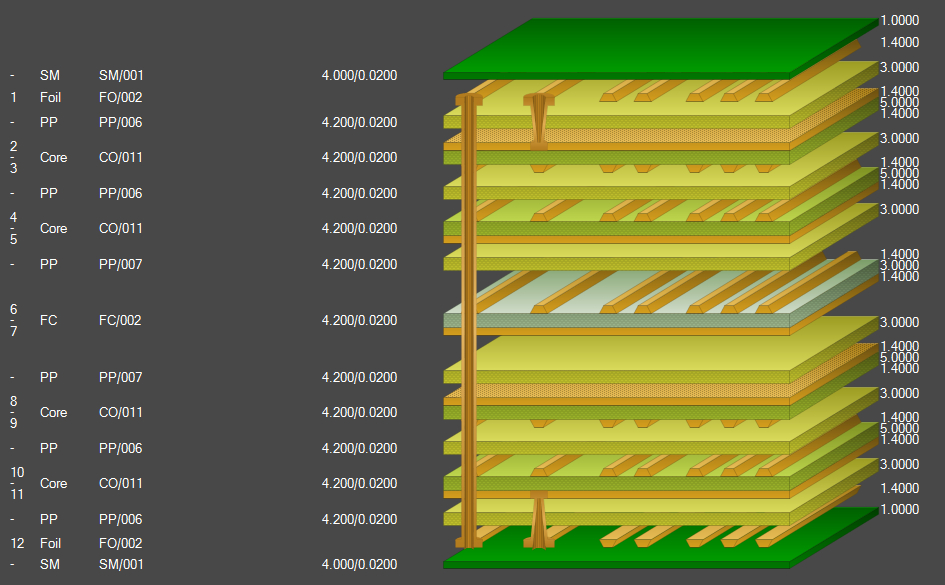
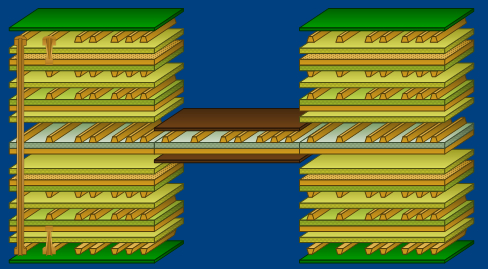
Speedstack Navigator showing completed rigid-flex construction Prior to construction ensure that the Units are set to Mils/Thou and that the Speedstack Flex/HDI License Option is checked.
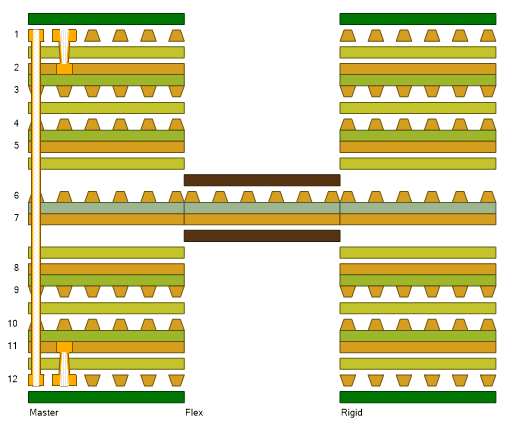
The note assumes an existing stack to which will be added a series of sub-stacks. This stack is referenced by Speedstack as the master stack. The master stack is effectively a "bill of materials" stack and contains all the materials used in all sub-stacks. The electrical layer numbers of sub-stacks are determined from the master stack, so this stack should be created first.
In the 12 layer master stack shown above the flexible core material is depicted in grey. Adding sub-stacks Use the Speedstack Navigator to create and modify sub-stacks. Press F4 to open the Navigator – the master stack is displayed.
To add a sub-stack:
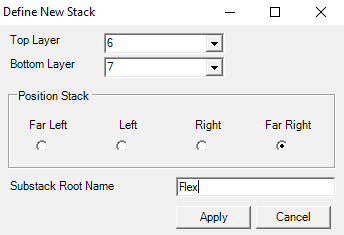
The Define New Stack dialog specifies which materials in the master stack are added to the new sub-stack.
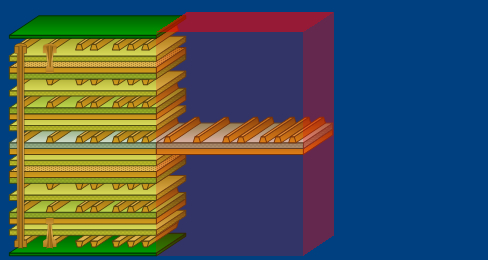
The new Flex stack (highlighted in red in the Speedstack Navigator) is added to the master
Click the new Flex stack in the Navigator to display the stack in the Speedstack Editor
Adding materials to the sub-stack Use the Speedstack Editor to add materials to the new Flex sub-stack – for example, to add coverlays to the flex core. Adding coverlays to the sub-stack
The completed 2-layer flex sub-stack contains a flex core with coverlay material above and below the exposed copper surfaces.
Adding a second sub-stack To complete the rigid-flex-rigid stack right-click the master stack, select Add Stack and choose Duplicate Master. Assign the new stack the name "Rigid" to add the additional rigid sub-stack.
The rigid-flex-rigid construction is complete and is shown in the Technical Report below
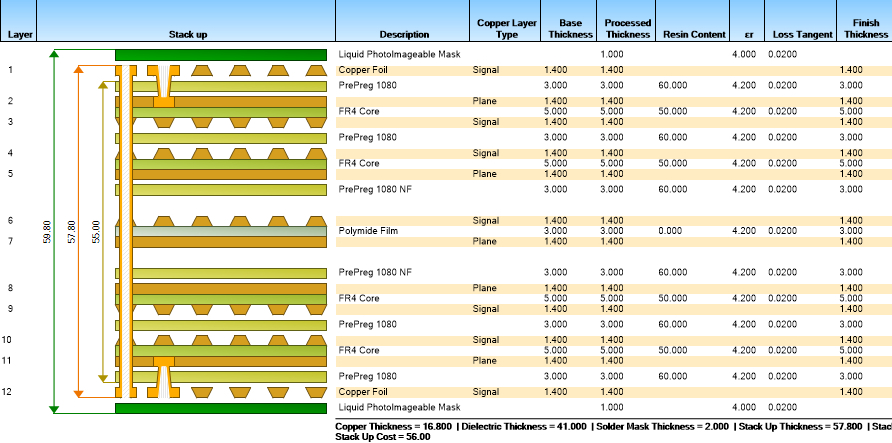
The Technical Report includes full details of the stack construction with all material parameters – the master stack is shown below.
The Flex sub-stack is shown below.
Save the stackup as a project (.sci) file. Project files contain all the stack constructions along with any controlled impedance structures. Impedance structures may be added to each sub-stack, with the structure types being determined by the materials in each sub-stack. See also these Speedstack tutorials: |
|||